Add a bot or integration
Bots and integrations are features that are accessible to all members of an organization.
Add a bot
-
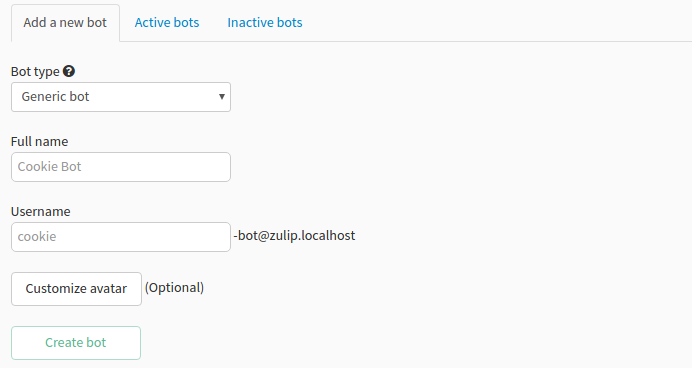
On this page, under the Add a new bot view, enter the bot type, a name, an email, and optionally an avatar for your bot. Then click the Create bot button to create your bot.
-
An entry such as the following should appear above the Add a new bot view, confirming the creation of your bot.

-
You now have access to your bot's API key and API configuration file (
.zuliprc) which you will need for integrations that you would like to use with this bot. You can click on the download () icon to download your.zuliprcfile.
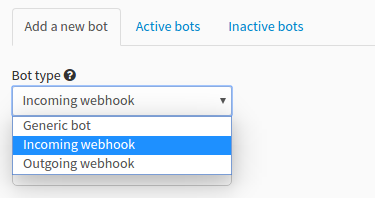
Bot types
You can create three types of bots:
-
Generic bot: A generic bot can send and receive messages. Choose this type if you want to:
- test and deploy a simple Python bot using the Zulip bots framework.
- interact with Zulip using the Zulip Python API.
-
Incoming webhook: The API keys for such bots are limited to only sending messages and can't receive messages. Thus, this bot type lessens the security risks associated with exposing such API keys to third-party services. Choose this type if you want to:
- deploy one of our integrations.
- develop your own integration that posts to Zulip. Note that
Incoming Webhookintegrations can only be developed in the Zulip repository.
-
Outgoing webhook: Bots of this type are the same as a Generic bot, except Outgoing webhooks bots have an extra field for the Endpoint URL of the third-party service being requested. Outgoing webhook bots send POST requests to this Endpoint URL. Choose this type if you want to:
- make Zulip post messages to a URL.
- deploy Zulip's botserver. This is the default way of deploying bots used in production.
Add an integration
The Integrations page offers a complete list of all the integrations currently supported by Zulip. To add an integration to your organization, select the integration that you would like to use from the list and follow the installation instructions accordingly.